Table of Contents
Introduction
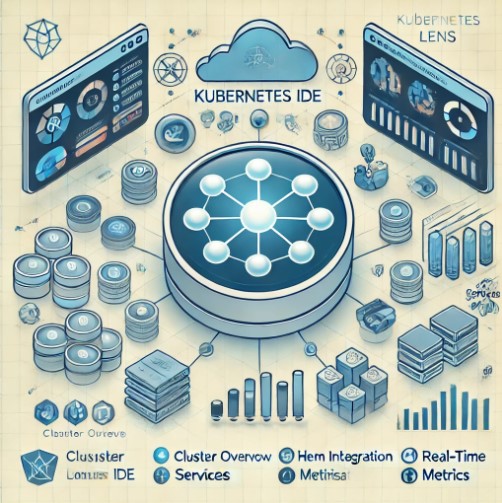
Kubernetes has become the go-to solution for container orchestration, but managing multiple clusters, services, and workloads can still be overwhelming, even for seasoned DevOps engineers. Enter Kubernetes Lens – a robust, open-source Integrated Development Environment (IDE) for Kubernetes that simplifies the entire process, offering real-time insights, multi-cluster management, and a user-friendly interface.
Whether you’re new to Kubernetes or an experienced operator, this guide takes a deep dive into Kubernetes Lens. We’ll cover everything from initial setup and configuration to advanced features like Helm support, real-time metrics, and a rich extension ecosystem.
What is Kubernetes Lens?
Kubernetes Lens is a comprehensive, open-source Kubernetes IDE designed to help administrators and developers manage and monitor Kubernetes clusters with ease. It offers a graphical interface that allows users to monitor clusters, troubleshoot issues, view real-time logs, and even manage resources — all from a single platform.
Lens allows users to manage multiple clusters across different environments, making it the perfect solution for those who work in complex, multi-cloud setups or use Kubernetes at scale.
Key Features of Kubernetes Lens
1. Cluster Management
One of the primary strengths of Kubernetes Lens is its ability to manage multiple clusters from a single interface. This feature is essential for users working in multi-cloud environments or managing clusters in different stages of development, such as production, staging, and development environments.
2. Real-Time Metrics
Lens provides real-time statistics and metrics, allowing you to monitor the health and performance of your Kubernetes resources without needing third-party tools. The metrics cover everything from CPU and memory usage to pod performance and node health.
3. Terminal Integration
You can interact with your Kubernetes clusters directly through an integrated terminal in Kubernetes Lens. This terminal allows you to run kubectl commands, shell into pods, and execute scripts without switching between different tools.
4. Log Viewer
Troubleshooting Kubernetes issues often involves looking through pod logs, and Lens makes this simple with its built-in log viewer. You can easily access logs from running or failed pods, filter logs by keyword, and analyze them without needing to access the command line.
5. Helm Charts Management
Helm is the go-to package manager for Kubernetes, and Lens integrates seamlessly with it. You can browse, install, and manage Helm charts directly from the Lens interface, simplifying the process of deploying applications to your clusters.
6. Extensions and Plugins
Lens supports a wide range of extensions, allowing you to customize and extend its functionality. These extensions range from additional monitoring tools to integrations with other cloud-native technologies like Prometheus, Jaeger, and more.
Why Kubernetes Lens?
Kubernetes Lens simplifies the user experience, making it the go-to tool for Kubernetes administrators and developers who want to avoid using multiple command-line tools. Here are some reasons why Kubernetes Lens stands out:
- Enhanced Productivity: With Kubernetes Lens, you can visualize your cluster’s resources and configurations, which speeds up debugging, management, and general operations.
- Multi-Cluster Management: Whether you’re working with clusters on AWS, Azure, GCP, or on-premises, Lens makes it easy to manage them all from one interface.
- Real-Time Insights: Lens provides instant access to real-time statistics, allowing you to make informed decisions regarding scaling, troubleshooting, and resource allocation.
- Developer-Friendly: For developers who might not be familiar with Kubernetes internals, Lens offers a simple way to interact with clusters, removing the complexity of using the
kubectlcommand-line tool for every task.
Step-by-Step Guide: Getting Started with Kubernetes Lens
Step 1: Installing Kubernetes Lens
Kubernetes Lens is available on Windows, macOS, and Linux. To install Lens, follow these steps:
- Go to the Kubernetes Lens official website.
- Download the appropriate version for your operating system.
- Follow the installation instructions for your platform (Lens provides a simple installer for all major OSs).
- Once installed, open Lens. It will automatically detect your existing Kubernetes configurations (if you have
kubectlset up) and display them in the interface.
Step 2: Connecting Kubernetes Clusters
Lens integrates directly with your existing Kubernetes clusters. If you’ve previously set up Kubernetes on your local machine (via Minikube, Kind, or other solutions), or if you have clusters on the cloud, Lens will automatically detect them.
To manually add a cluster:
- Click on Add Cluster.
- Import your Kubeconfig file (this can be exported from your cloud provider or local setup).
- Your cluster will now appear in the Clusters tab.
Step 3: Exploring the Interface
Kubernetes Lens provides a simple, intuitive interface. Here’s a quick overview of the main sections:
- Cluster Dashboard: Shows an overview of the health and resources of your connected cluster. You can monitor nodes, pods, and services in real-time.
- Workload Views: This section provides detailed insights into workloads, such as deployments, stateful sets, jobs, and pods.
- Networking: Manage services, ingresses, and network policies.
- Storage: View persistent volumes (PV) and persistent volume claims (PVC) usage across your cluster.
- Configuration: Manage Kubernetes ConfigMaps, Secrets, and other configurations directly from the Lens interface.
Advanced Kubernetes Lens Features
Helm Charts
Helm simplifies application deployment on Kubernetes, and Lens integrates directly with Helm for chart management. You can:
- Browse Helm repositories and view available charts.
- Install, upgrade, or rollback Helm charts.
- View the status of each Helm release directly from the Lens UI.
Multi-Cluster Management
With Kubernetes Lens, you can manage multiple clusters from different environments, including on-premises and cloud-hosted Kubernetes setups. Switching between clusters is as easy as clicking on the desired cluster, allowing you to work across multiple environments without the need for multiple windows or command-line sessions.
Extensions and Plugins
Lens offers an extensive library of extensions that allow you to add new capabilities, such as:
- Prometheus for advanced monitoring and alerting.
- Jaeger for distributed tracing.
- GitOps tools for continuous delivery.
You can find and install these extensions directly from Lens, or even create your own custom extensions.
Integrated Terminal
One of the standout features of Kubernetes Lens is the integrated terminal. It enables you to:
- Run
kubectlcommands directly from the Lens interface. - Connect to any pod and open an interactive shell.
- Run scripts and manage resources without leaving the Lens environment.
Best Practices for Using Kubernetes Lens
Regularly Monitor Cluster Health
Kubernetes Lens provides a dashboard with real-time metrics. Make it a habit to regularly monitor this data to identify potential bottlenecks, resource issues, or misconfigurations. Proactive monitoring helps prevent outages and improves overall cluster performance.
Leverage Helm for Application Management
Helm simplifies complex Kubernetes deployments by managing applications as packages. Kubernetes Lens’ Helm integration allows you to easily install, update, and manage applications across multiple clusters. Make use of Helm to streamline the deployment of microservices and other Kubernetes-based applications.
Use Extensions to Enhance Lens Functionality
Extensions are a powerful feature of Kubernetes Lens. If you’re using additional Kubernetes tools like Prometheus, Jaeger, or ArgoCD, leverage their Lens extensions to enhance your monitoring and management capabilities. Explore the Lens extension hub to discover new tools and integrations that can benefit your specific workflow.
Frequently Asked Questions (FAQs)
1. Is Kubernetes Lens completely free?
Yes, Kubernetes Lens is an open-source project and free to use for both personal and commercial purposes.
2. How does Kubernetes Lens handle multi-cluster management?
Lens allows you to manage multiple clusters from a single interface, making it easy to switch between environments and monitor all your clusters in one place.
3. Does Kubernetes Lens support Helm integration?
Yes, Kubernetes Lens fully supports Helm. You can browse Helm charts, install applications, and manage releases directly from the Lens interface.
4. Can I install extensions in Kubernetes Lens?
Yes, Kubernetes Lens has a rich ecosystem of extensions. You can install these extensions from the Lens Extension Hub or develop custom extensions to meet your needs.
5. Do I need to be a Kubernetes expert to use Kubernetes Lens?
No, Kubernetes Lens simplifies many aspects of Kubernetes management, making it accessible for beginners. However, some basic Kubernetes knowledge will be helpful for advanced features.

Conclusion
Kubernetes Lens is a game-changer for Kubernetes cluster management. Whether you’re just starting with Kubernetes or are a seasoned administrator, Lens offers an intuitive, feature-rich interface that simplifies everything from monitoring workloads to managing Helm charts and extensions. Its ability to manage multiple clusters and provide real-time insights makes it an indispensable tool for anyone working with Kubernetes.
If you’re looking to streamline your Kubernetes operations, Kubernetes Lens should be your go-to IDE. Start using it today to experience its full potential in simplifying your Kubernetes workflows! Thank you for reading the DevopsRoles page!
