Portainer frequently releases updates. You can not simply login to your Portainer container upgrade button, in this tutorial, How to Deploy the Latest Portainer Release.
Table of Contents
Backup Portainer container.
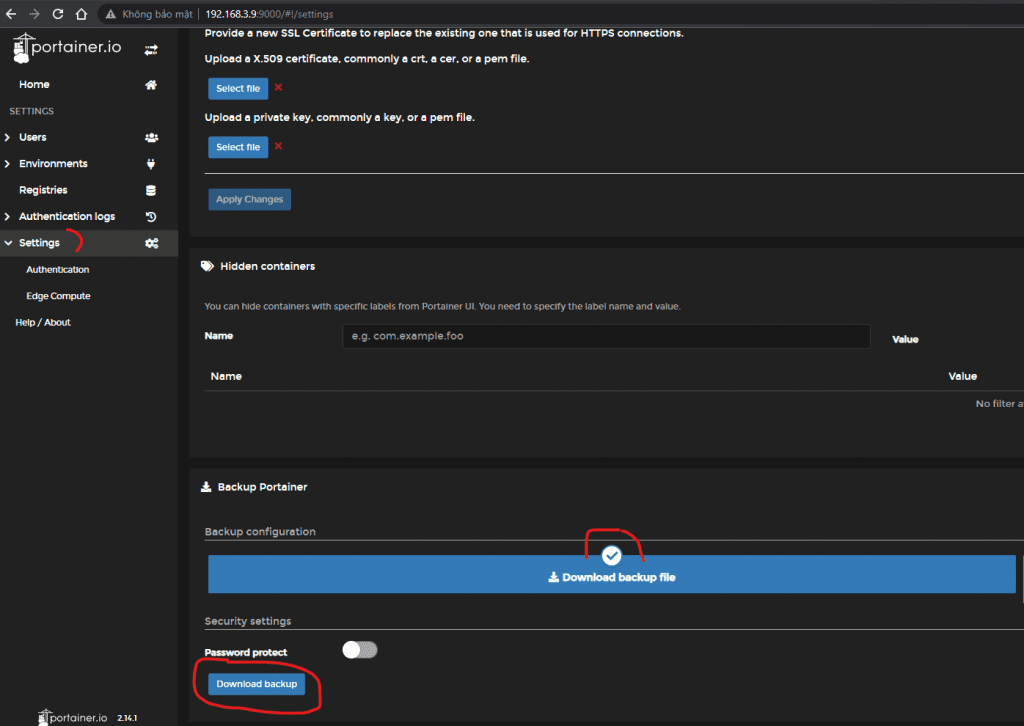
I’ll back up the current Portainer deployment.
Login with admin user and click Settings in the left navigation as in the picture below:

I will download the backup file to local storage and save a .tar.gz
Stop/Remove the Current Portainer Container
Login to the Container ID of Portainer and run the command below:
docker ps -a|grep portainer
docker stop ID
docker rm ID
Where ID is the ID of the Portainer container.
For example, The output terminal is as below:

Deploy the Latest Portainer Release
See install Portainer docker here. I used portainer_data for persistent storage.
First, You need to pull down the Portainer latest.
docker pull portainer/portainer-ce:latestDeploy Portainer with the command line as below
docker run -d -p 8000:8000 -p 9000:9000 --name=portainer --restart=always -v /var/run/docker.sock:/var/run/docker.sock -v portainer_data:/data portainer/portainer-ceOpen a web browser and access to link: http://SERVER:9000

Restore a Backup for the Portainer container.
You need to deploy a fresh instance of Portainer with an empty data volume and choose the Restore Portainer from the backup option during setup. Click Select file and navigate to the .tar.gz file you downloaded earlier. After selecting the file, click Restore Portainer.

Conclusion
You have to deploy Portainer Docker. Please note that these steps provide a basic overview of deploying Portainer.
For a production environment, it’s essential to consider security measures and other best practices. It’s always recommended to consult Portainer’s official documentation for more detailed instructions specific to the latest release and any additional configuration options.
I hope will this your helpful. Thank you for reading the DevopsRoles page!
