Table of Contents
Introduction
Creating minimal Docker images for Python applications is essential for optimizing performance, reducing attack surface, and saving bandwidth. A smaller Docker image can significantly speed up the deployment process and make your applications more portable. This guide will walk you through the process of creating minimal Docker images for Python applications, from basic steps to more advanced techniques.
Why Create Minimal Docker Images?
Benefits of Minimal Docker Images
- Reduced Size: Smaller images use less disk space.
- Faster Deployment: Smaller images transfer and load quicker.
- Improved Security: Fewer components mean a smaller attack surface.
- Efficiency: Optimized images use fewer resources, leading to better performance.
Common Pitfalls
- Overcomplication: Trying to do too much in one image.
- Redundancy: Including unnecessary libraries and tools.
- Poor Layer Management: Not structuring Dockerfile effectively, leading to larger images.
Basic Steps to Create Minimal Docker Images
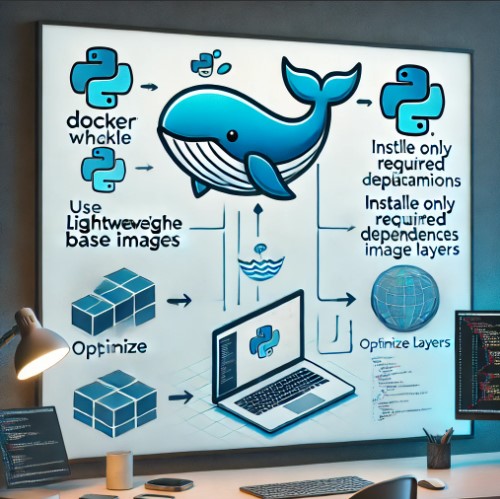
Step 1: Choose a Minimal Base Image
Using a minimal base image is the first step in reducing the overall size of your Docker image. Common minimal base images include alpine and python:slim.
Example: Using Alpine
FROM python:3.9-alpineStep 2: Install Only Required Dependencies
Only install the dependencies that your application needs. Use requirements.txt to manage these dependencies efficiently.
Example: Installing Dependencies
FROM python:3.9-alpine

# Set working directory
WORKDIR /app

# Copy requirements.txt and install dependencies
COPY requirements.txt .
RUN pip install --no-cache-dir -r requirements.txt

# Copy the rest of the application code
COPY . .
Step 3: Remove Build Dependencies
After installing dependencies, remove any packages or tools used for building that are not needed at runtime.
Example: Removing Build Tools
FROM python:3.9-alpine

# Install build dependencies
RUN apk add --no-cache gcc musl-dev

# Set working directory
WORKDIR /app

# Copy requirements.txt and install dependencies
COPY requirements.txt .
RUN pip install --no-cache-dir -r requirements.txt

# Remove build dependencies
RUN apk del gcc musl-dev

# Copy the rest of the application code
COPY . .
Intermediate Techniques for Reducing Image Size
Use Multi-Stage Builds
Multi-stage builds allow you to separate the build environment from the runtime environment, resulting in smaller final images.
Example: Multi-Stage Build
# Stage 1: Build
FROM python:3.9-alpine as build

# Install build dependencies
RUN apk add --no-cache gcc musl-dev

# Set working directory
WORKDIR /app

# Copy requirements.txt and install dependencies
COPY requirements.txt .
RUN pip install --no-cache-dir -r requirements.txt

# Copy the rest of the application code
COPY . .

# Stage 2: Runtime
FROM python:3.9-alpine

# Set working directory
WORKDIR /app

# Copy dependencies and application code from build stage
COPY --from=build /app /app

# Command to run the application
CMD ["python", "app.py"]
Use .dockerignore File
Similar to .gitignore, the .dockerignore file specifies which files and directories should be excluded from the Docker image. This can help reduce the image size and improve build times.
Example: .dockerignore
*.pyc
__pycache__/
.env
tests/
Advanced Techniques for Optimizing Docker Images
Minimize Layers
Each command in a Dockerfile creates a new layer in the image. Combining multiple commands into a single RUN instruction can reduce the number of layers and thus the overall image size.
Example: Combining Commands
FROM python:3.9-alpine

# Set working directory
WORKDIR /app

# Copy requirements.txt and install dependencies
COPY requirements.txt .
RUN apk add --no-cache gcc musl-dev \
    && pip install --no-cache-dir -r requirements.txt \
    && apk del gcc musl-dev

# Copy the rest of the application code
COPY . .
Use Scratch Base Image
For the ultimate minimal image, you can use the scratch base image. This is an empty image, so you’ll need to include everything your application needs to run.
Example: Using Scratch
# Stage 1: Build
FROM python:3.9-alpine as build

# Install build dependencies
RUN apk add --no-cache gcc musl-dev

# Set working directory
WORKDIR /app

# Copy requirements.txt and install dependencies
COPY requirements.txt .
RUN pip install --no-cache-dir -r requirements.txt

# Copy the rest of the application code
COPY . .

# Stage 2: Create minimal runtime image
FROM scratch

# Copy Python binary and dependencies from the build stage
COPY --from=build /usr/local /usr/local
COPY --from=build /app /app

# Set working directory
WORKDIR /app

# Command to run the application
CMD ["/usr/local/bin/python", "app.py"]
Frequently Asked Questions (FAQs)
What is the difference between alpine and slim base images?
Alpine is a minimal Docker image based on Alpine Linux, known for its small size. Slim images are stripped-down versions of the official images, removing unnecessary files while keeping essential functionalities.
How can I further reduce my Docker image size?
- Use multi-stage builds.
- Minimize the number of layers.
- Use
.dockerignoreto exclude unnecessary files. - Optimize your application and dependencies.
Why is my Docker image still large after following these steps?
Check for large files or dependencies that might be included unintentionally. Use tools dive to inspect and analyze your Docker image layers.
How do I manage environment variables in Docker?
You can use the ENV instruction in your Dockerfile to set environment variables, or pass them at runtime using the -e flag with docker run.
Is it safe to use minimal images in production?
Yes, minimal images can be safe if you include all necessary security patches and dependencies. They often enhance security by reducing the attack surface.

Conclusion
Creating minimal Docker images for Python applications involves selecting a minimal base image, installing only necessary dependencies, and using advanced techniques like multi-stage builds and combining commands. By following these practices, you can significantly reduce the size of your Docker images, leading to faster deployments and more efficient applications. Implement these steps in your next project to experience the benefits of optimized Docker images. Thank you for reading the DevopsRoles page!

